September 24th, 2022
Here at YYC Software we love static websites. They are fast, secure, reliable, and easy to deploy but they come with other challenges.
So what is a static website? A static website relies on only the files that are stored on a server. This means the server is not involved in any generating or altering of files. This presents challenges in we don't have anything listening to actions a user does on our website. So without some other tools there is nothing to send let's say... a form response to.
So how do we fix this? Well there are many tools available but we are most partial to Netify. Netify is a great place to host your static websites and provides you with a bunch of tools to make those websites usable. We will be focussing on Netify Forms.
Netify provides a tutorial on how to use their forms here if you are interested. In this article we will provide a more concrete example for you to follow. I'd recommend reading our article first then moving onto their tutorial.
Okay let's get started! The first thing we will need is a Netify account. Go here and sign up for a free account. Once logged in, go to Sites and add a new site of whatever test project you have. Next use the following code in your website to create a form.
<h2>Contact Us</h2>
<form id="contact" name="contact" method="POST" data-netlify-recaptcha="true" data-netlify="true">
    <p>
        <label>Name:
        <input type="text" name="name" placeholder="Jim Halpert" required /></label>
    </p>
    <p>
        <label>Email:
        <input type="email" name="email" placeholder="name@domain.com" required /></label>
    </p>
    <p>
        <label>Message:
        <textarea name="message" placeholder="Your Message" rows="4" required></textarea></label>
    </p>
    <p>
        <div class="g-recaptcha" id="rcaptcha" data-theme="dark" data-sitekey="$captcha-key$"></div>
        <span id="captcha"></span>
    </p>
    <p>
        <button class="btn btn-default" type="submit">Send</button>
    </p>
</form>
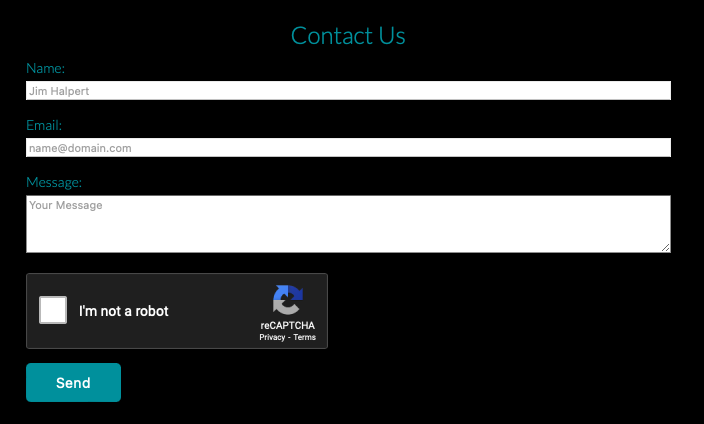
The main things to note are in the form element we have a data-netify attribute set to true. All you need is this attribute for netify to know you want a form to be used through their website. We also add the data-netify-recaptcha attribute to let our reCaptcha input work through Netify's servers. The name attribute will be what Netify uses to name your form when looking under the forms tab for your website in Netify. Below you can see what this form looks like on my website.
Now once you have deployed the website and you can see the form in your forms tab on Netify. All you have to do is go down to form notification and add your preferred method of receiving the form data. Just like that you are done! Super simple and allows you the freedom of keeping a static website while still receiving your form submissions.
If you have any questions feel free to submit using the contact form at the bottom of this page and we will get right back to you as soon as we can. Thanks for reading!